By changing "Color Balance" and "Brightness-Contrast" our once very much alive character has become "Sick, Dead, Suffering from Hypothermia"?

https://lh3.googleusercontent.com/-MPxbwLYiVm0/Uk4q5B5rrLI/AAAAAAAABLs/vyt4obXuAKI/w960-h540-no/Screenshot.png

https://lh4.googleusercontent.com/-E7Th5s_qTeo/Uk7YzDnEJoI/AAAAAAAABO0/gZu-PJHR84k/w960-h540-no/ScreenShot3.png

I could make a plug-in for Maratis using ImageMagick(Magick++) <-- C++ Api  that could make the changes to the texture in memory over time. Example: Characters in cold environments could gradually become more and more "Hypothermic" looking from the cold.

Now that I think about it I bet you could animate normal's.

Tutorial Doctor wrote:

From what I have been learning about normal maps, they are supposed to make relatively flat geometry appear to have complex geometry, and are usually generated from a higher poly mesh to a lower poly mesh. They also cause the lower poly mesh to interact with light as if it were the high poly mesh. I will attempt a test today.

Bump maps don't store light information, and displacement maps deform the actual mesh.

Wikipedia says.

http://en.wikipedia.org/wiki/Bump_mapping

Bump mapping is a technique in computer graphics for simulating bumps and wrinkles on the surface of an object. This is achieved by perturbing the surface normals of the object and using the perturbed normal during lighting calculations. The result is an apparently bumpy surface rather than a smooth surface although the surface of the underlying object is not actually changed. Bump mapping was introduced by Blinn in 1978.[1]

Normal mapping is the most common variation of bump mapping used.[2]

The grayscale depth is the light info, or depth info. I usually use them because you can use them for both normal mapping and as a height map in blender. Saves you from having to load an extra image. Grayscale images also have a third and forth use in blender, spec mapping and ao.

I was thinking of making our character some kind of "Medieval Necromancer" for the tutorial. Well Medieval Necromancer need evil spell books. This is what I got so far.

https://lh5.googleusercontent.com/-y3Nu5ORWzmE/Uk5ttKGV60I/AAAAAAAABNk/pVd1DgcfgbY/w960-h540-no/ScreenShot.png

Here's the Medieval Necromancer, added some armor and a tunic.
https://lh6.googleusercontent.com/-5tXuFR5Bnv8/Uk5wnj60l0I/AAAAAAAABOE/qF_zrn0-Yl0/w960-h540-no/ScreenShot1.png


Here are my source images, in-case you were interested.

http://fotobg.ru/upload/img1354186410.jpg
http://img.gawkerassets.com/img/17e6p1jmbzcl5jpg/ku-xlarge.jpg
http://fotobg.ru/upload/img1345911150.jpg
http://th08.deviantart.net/fs70/PRE/i/2012/169/6/2/4_hd_flesh_textures_by_thatsavior-d53wxoy.jpg

I usually use Insanebump or Pixmap2.

On Blender both Normal and Bump maps are pretty much the same thing, except Normalmaps have more of a dramatic effect, I use bump mapping for fine detail like pores, wrinkles and facial stubble.

Blender has a displacement modifier you can use, that will take a grayscale image and modify geometry.

But in blender with out the displacement modifier no geometry is changed by bump mapping.

155

(15 replies, posted in Showcase)

The AO looks really good and the lighting in those last two examples is really impressive.

I was going to post a tutorial on painting bump maps, but it appears maratis only supports normal maps.

Instead what you can do, is if you use gimp install the gimp-normalmap plugin found here https://code.google.com/p/gimp-normalmap/ and the Insanebump plugin found here http://registry.gimp.org/node/28117

https://lh3.googleusercontent.com/-j0bIRfxVl60/Uk5SAwi29RI/AAAAAAAABNA/MsgP2iB8TOc/w368-h540-no/snapshot34.png

The Insanebump script allows you to generate.

1. Normal maps
2. Specular maps
3. Diffuse maps
4. Ambiend occlusion (AO) maps
5. Displacement (or height) maps

In Low, Medium and High Detail

https://lh6.googleusercontent.com/-hAbnrIXBfJw/Uk5R3Gy9joI/AAAAAAAABM4/5g9x6HW5MmE/w1096-h627-no/Screenshot2.png

It does the same-thing as Pixplant2 or Crazybump but is free.


Once you finish painting your model, just run the texture thru the Insanebump plugin and apply the Normal and Specular map in Blender.

Tutorial Doctor wrote:
zester wrote:

Here is a screenshot of my character in blender so far, I am not sure why the normalmap is so strong in Maratis thou.

https://lh3.googleusercontent.com/-MPxbwLYiVm0/Uk4q5B5rrLI/AAAAAAAABLs/vyt4obXuAKI/w960-h540-no/Screenshot.png

Did you change the inlfluence amount?

I changed the "Normal" value under "Geometry" but even with it set to 0.0 its still really strong like that. Ill package it up and upload it soon, right now I am just having a bit of fun adding skin blemishes.

Going to play with adding some dirt to try and make him look dirty.

https://lh5.googleusercontent.com/-7mCTSKp7gI4/Uk4wDW8wIBI/AAAAAAAABMQ/c13eTDdhaJc/w960-h540-no/Screenshot2.png

Here is a screenshot of my character in blender so far, I am not sure why the normalmap is so strong in Maratis thou.

https://lh3.googleusercontent.com/-MPxbwLYiVm0/Uk4q5B5rrLI/AAAAAAAABLs/vyt4obXuAKI/w960-h540-no/Screenshot.png

Sorry the "Bump/Spec/AO" map tutorial is taking so long, but I am having a problem that I can't seem to figure out.

https://lh4.googleusercontent.com/-tYIo_8mIGvM/Uk4aeWb7bwI/AAAAAAAABLE/inEYJxKjnTY/w960-h540-no/Screenshot.png
https://lh3.googleusercontent.com/-x357IlB71mo/Uk4aejsWh9I/AAAAAAAABLI/1jXoA122dq8/w749-h630-no/Screenshot1.png

Not looking right.

160

(6 replies, posted in General)

Here are a couple different effects I got playing with the Maratis Particle Effects example.

I disabled physics for all examples, performance was excellent.

100 Particles
https://lh6.googleusercontent.com/-kNAjRIf4Oto/Uk0CiWoOGuI/AAAAAAAABG0/Ul0FatOde9Y/w860-h646-no/snapshot33.png

20 Particles
https://lh3.googleusercontent.com/-6Lt6N65rlaE/Uk0CirDgtuI/AAAAAAAABGw/uoTO3qbIkyk/w862-h646-no/snapshot36.png

20 Particles
https://lh5.googleusercontent.com/-ryAigR1nmtI/Uk0CiiyIN4I/AAAAAAAABG4/vOBjYEQ1yeQ/w864-h646-no/snapshot37.png


Using a Cone Shape(Rotating) with some debri parented to the cone, an animated texture and a small particle emitter at the bottom of the cone using a dust particle I bet you could make a pretty cool looking tornado.


If your creative and don't emit more than 200-250 particles you can defiantly get some decent effects. The particle count is so low do to lua and not the graphics engine, I hit the threshold regardless if I use my on-board intel gpu or my Nvidia GT 640 card.

You could probable get 2000+ particles if done in c++.

Here are the particle textures I used.

https://lh3.googleusercontent.com/-qRYKbvmVBuE/Uk0H375skrI/AAAAAAAABHc/YXBGINqhhE8/w640-h360-no/45126915_640.jpg

https://lh6.googleusercontent.com/-xKgbblIM0fM/Uk0H7MXimLI/AAAAAAAABHk/o-rcSiRMP1I/w198-h197-no/fire.png

And my changes to the effects.lua script

-----------------------------------------------------------------------------------
-- Maratis
-- effects.lua
-----------------------------------------------------------------------------------

-- GUI
Camera = getObject("Camera")
GUIScene = getScene("GUI")
enableCameraLayer(Camera, GUIScene)

-- pseudo particle system
Emitter = getObject("Emitter")
Particle = getObject("Particle")


-- particles functions
function getRandomDir(force)

    return {(math.random()-0.5)*force, (math.random()-0.5)*force, (math.random()-0.5)*force}

end

function initParticle(particle)

    size = 10.0 + math.random()
    life = math.max(0.50, math.random())

    setAnimationSpeed(particle, life) -- we use the animation speed to control the particle life
    changeAnimation(particle, 0)
    setCurrentFrame(particle, 0)

    clearForces(particle)
    setPosition(particle, getPosition(Emitter))
    setScale(particle, {size, size, size})
    --addCentralForce(particle, getRandomDir(1))
    
end

function createParticle()

    particle = getClone(Particle)
    initParticle(particle)

    return particle
    
end

function addParticle()
    table.insert(particlesList, #particlesList + 1, createParticle())
end

function updateParticle(particle)

    if isAnimationOver(particle) then
        deactivate(particle)
    end

    if onKeyDown("SPACE") then

        activate(particle)
        initParticle(particle)

    end
    
end


-- create particle system (64 particles + 1)
particlesList = {Particle}

initParticle(Particle)

for i=1, 20 do
    addParticle()
end


-- scene update
function onSceneUpdate()

    for i=1, #particlesList do
        updateParticle(particlesList[i])
    end

end

Note I moved my emitter to the ceiling and rotated to shoot downwards.

161

(6 replies, posted in General)

Tutorial Doctor wrote:

Thanks Zester. I have been looking at the Special Effects demo to see what is wrong with it (it crashes Maratis if I hit the space bar too close together.)

I also got a texture animation into Maratis for water (I wonder if I can use some of those After Effects effects hmm)

I do wonder however if there is a way to export every frame as an object automatically?

Honestly I can't really say as I don't know, I only really use Maratis for simple games and I use it to teach game development to my kids other than that I use my own engine a"Horde3D" fork, or Ogre3D

https://lh4.googleusercontent.com/-U6kw6dCmOY0/T7GcntK0wdI/AAAAAAAAAPU/JjT9e0ABqVU/w303-h238-n-k/horde3d.png

https://lh5.googleusercontent.com/-jRVMKS4m4Rw/T7GcmIQ34qI/AAAAAAAAAPE/xJDIlOWEQlw/w307-h184-n-k/horde3d2.png

https://lh5.googleusercontent.com/-PrZm-f8hM8k/T7Gck7CcFXI/AAAAAAAAAO8/feY1fWWTnHw/w310-h184-n-k/horde3d3.png

https://lh4.googleusercontent.com/-oiB9XKV_uhk/T7GckkgQUyI/AAAAAAAAAO0/6uYaPlTiudg/w306-h184-n-k/horde3d4.png

https://lh4.googleusercontent.com/-gzJC-0WZut8/T7GcmogAJ5I/AAAAAAAAAPM/-T6ST89EotU/w398-h238-n-k/horde3d1.png

Lua Example Code

-- Create Window Object
win = Window()
win:init()
win:openWindow(800, 600, 8, 8, 8, 8, 24, 0, 0) -- Open Window, Set Max Colors, Alpha, Depth, Stencel 
win:setWindowTitle("Hydra Example v0.0.1a") -- Set Window Title
win:clearColor(0.50, 0.0, 0.0, 1.0) -- Set Window RGBA background color

-- Create GraphicsEngine Object
graphics = GraphicsEngine()
graphics:init()

graphics:setOption(7, 1)
graphics:setOption(5, 0)
graphics:setOption(8, 0)
graphics:setOption(4, 4)
graphics:setOption(9, 2048)

forwardPipeRes = graphics:addResource(9, "pipelines/forward.pipeline.xml", 0)
knightres = graphics:addResource(1, "models/knight/knight.scene.xml", 0)
logoMatRes = graphics:addResource(4,  "overlays/logo.material.xml", 0) 
lightMatRes = graphics:addResource(4,  "materials/light.material.xml", 0) 
envRes = graphics:addResource(1,  "models/platform/platform.scene.xml", 0) 
skyBoxRes = graphics:addResource(1,  "models/skybox/skybox.scene.xml", 0) 

graphics:loadResourcesFromDisk("../content") 

cam = graphics:addCameraNode(1, "Camera", forwardPipeRes)
graphics:setNodeTransform( cam, 10, 50, 200, 0, 0, 0, 1, 1, 1 )

env = graphics:addNodes(1, envRes)
graphics:setNodeTransform(env, 0, 0, 0, 0, 0, 0, 5, 5, 5)

sky = graphics:addNodes(1, skyBoxRes)
graphics:setNodeTransform(sky, 0, 0, 0, 2, 2, 2, 500, 500, 500)
graphics:setNodeFlags( sky, 2, true )

knight = graphics:addNodes(1, knightres )
graphics:setNodeTransform( knight,  0, 0, 40, 0, 0, 0, 1, 1, 1 )

light = graphics:addLightNode(1, "Light1", lightMatRes, "LIGHTING", "SHADOWMAP" )
graphics:setNodeTransform( light, 0, 100, 50, -30, 0, 0, 10, 10, 10 )
graphics:setNodeParamF( light, 501, 0, 200 )
graphics:setNodeParamF( light, 502, 0, 90 )
graphics:setNodeParamI( light, 505, 3 )
graphics:setNodeParamF( light, 506, 0, 0.9 )
graphics:setNodeParamF( light, 507, 0, 0.001 )
graphics:setNodeParamF( light, 503, 0, 0.9 )
graphics:setNodeParamF( light, 503, 1, 0.7 )
graphics:setNodeParamF( light, 503, 2, 0.75 )

graphics:setNodeParamI( cam, 609, 0 );
graphics:setNodeParamI( cam, 610, 0 );
graphics:setNodeParamI( cam, 611, 800 );
graphics:setNodeParamI( cam, 612, 600 );
graphics:setupCameraView(cam, 45.0, 800 / 600, 0.5, 2048.0);
graphics:resizePipelineBuffers( forwardPipeRes, 800, 600 );


-- Create 3D Sound Object
sound = Sound()
sound:init() -- Initalize it
sound:createSound("../content/sounds/Scoldt-From_My_Guts.mp3") -- Load Music File
sound:setMode(0) -- Set Mode
sound:play() -- Play Music
sound:upDateSystem() -- Update Sound System

-- Create Network Client Object
networkClient = NetworkClient()
networkClient:init("testgame","1") -- Initalize it
networkClient:setAddress("81.168.26.50") -- Set Network Address

-- Start Game Loop
i = 0
while i == 0 do
    win:clear(0) -- Clear Window

    i = win:getKey(257) or win:getWindowParam(0) -- Get ESC and Window Close Button Click

    -- Rendering code goes here --
    graphics:render( cam )
    graphics:finalizeFrame()
    graphics:clearOverlays()

    win:swapBuffers() -- Swap Graphic Buffers
end
Tutorial Doctor wrote:

Hey Zester, got the Character animated and into Maratis:

http://forum.maratis3d.com/viewtopic.php?id=775

Yahh I downloaded and took a look, great job. Shes has clothes "that are not" painted on and your using bvh animations. Very cool can't wait to see what else you can produce. From the looks of it you appear to be very dedicated to being a game developer. Good job your defiantly on your way.

Tutorial Doctor wrote:

Hey Zester, this is what I managed with Texture Atlas:
PunBB bbcode test

Oh cool, Texture Atlas is a neat little plugin make creating AO maps really easy. Also the "Auto Unwrap" feature doesn't do a half bad job. I will some times go in and "Average Island Scale" and "Pack" the uvs. And it looks like you stumbled on some of the advanced UV features. There is a check box in there somewhere's to show you were the stretching is if there is any.

164

(11 replies, posted in Gossip)

I am surprised you don't have BVHacker in your software links http://davedub.co.uk/bvhacker/ you can use it to edit those BVH files. You can for example delete the frames/animations you don't need and replace them with ones from other bvh files that you do want.

Tutorial Doctor wrote:

haha. This is the best topic I've seen so far. If only we could get normal maps into Maratis. I just downloaded 2,000 + bvh files, gonna see if I can use one to add to my character.

I have used texture atlas to bake some AO, but I still don't get how it works yet.

Normalmaps should work just fine in Maratis did you follow the Blender exporter tutorial http://www.maratis3d.org/?p=277
The order that the maps are placed do make a difference.

http://www.maratis3d.com/wp-content/uploads/2011/01/07.jpg

Even if you don't have a Specular map Normal still has to be placed on the third line.

Very nice Introductory to Programming tutorial but, I would use the BBCode tags to format your tutorial.
Example this code should be in a code tag.

--OBJECTS
box = getObject("box")
--JUMP VARIABLES
jump_object = box
jump_height = 3
jump_speed = 1
jump_btn = "SPACE"
jump_animation = changeAnimation(object, animationId)
jump_direction = {jump_up,jump_down,jump,left,jump_right}
jump_up = vec3(x, y, jump_speed*jump_height) 
jump_down =    vec3(x, y, jump_speed*jump_height) 
jump_left =    vec3(-jump_speed*jump_height, y, z) 
jump_right = vec3(jump_speed*jump_height, y, z) 
collisions = getNumCollisions(box)
--JUMP FUNCTION
function Jump(jump_object,jump_direction,jump_btn,jump_animation)
    if isKeyPressed(jump_btn) then
        changeAnimation(jump_object,jump_animation)
        addCentralForce(jump_object, jump_direction, "local")
    end
end
--MAKE ANY OBJECT JUMP
function onSceneUpdate()
    Jump(box,jump_up,jump_btn,jump_animation)
end

That Skyrim screenshot inspired me to speed model some armor, 60 secs. Once again something anyone with basic modeling skills can do.

https://lh5.googleusercontent.com/-83QofyrIdRE/Uky1HBBbtmI/AAAAAAAABF8/D9lMcUEiMGI/w960-h540-no/snapshot32.png

Tutorial Doctor wrote:

yikes! haha.

This does make not hate Blender so much now. hehe.

I still have issues with it, but at least I can actually do some stuff with Maratis now (stuff I have been working on)

I am trying to get it hooked up to some bvh files as I type.

If you can follow my tutorial style then you will be a Blender game making god in no time. Do you know how to use the Texture Atlas plugin for Ambient Occlusion?

Tutorial Doctor wrote:

You're right! haha. That is exactly what I was thinking of. haha.

lol wink

A little more practice and something like ....

http://aeportal.in/wp-content/uploads/2011/08/Skyrim-Characters-Orc.jpg

will be a piece of cake.

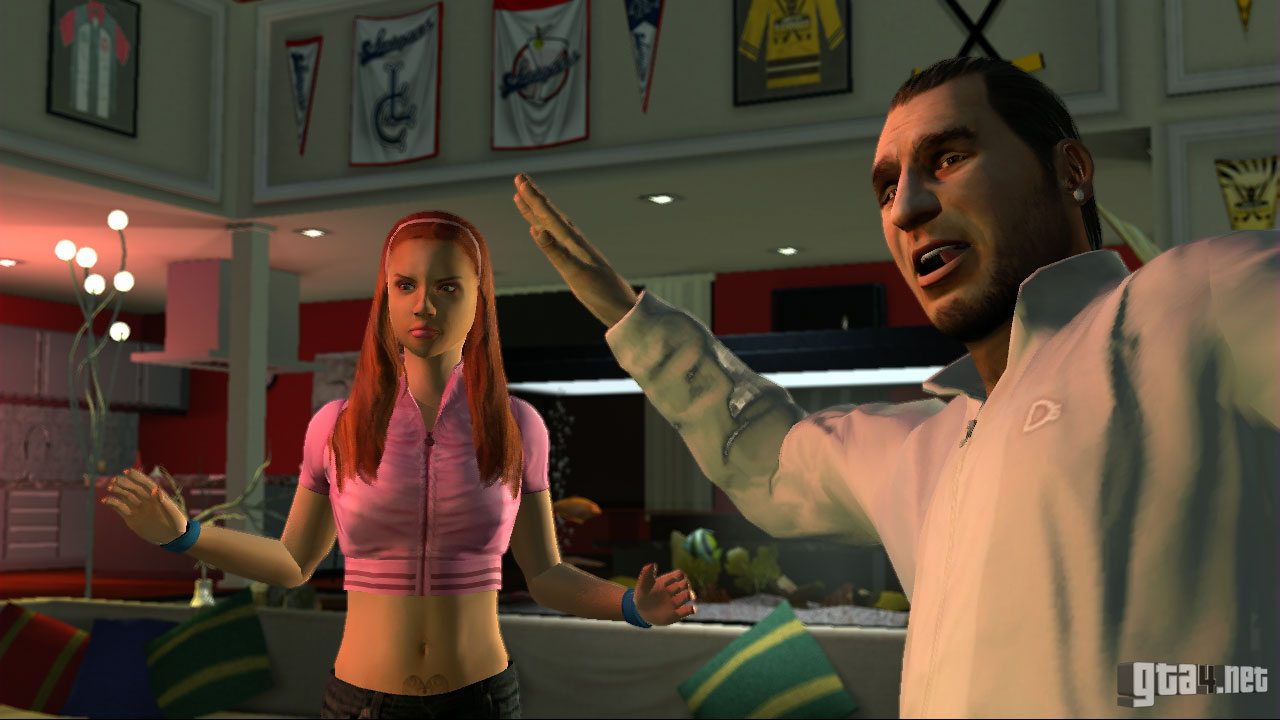
Looks good and congratulations, your now producing GTA 4 quality characters.

http://media.gtanet.com/images/6526-gta-gay-tony-caught-with-your-pants-down.jpg

171

(44 replies, posted in Scripting)

Tutorial Doctor wrote:

AHHH! Okay! Thanks Zester! That is actually a GREAT idea (Decision trees & coroutines). These are VERY useful!

No wonder people have been missing you here! I am sorta new here, but you have helped me squash some speed bumps I have been trying to figure out! haha.

I move fast, so expect to see a game level in a few days implementing what I have learned from you (perhaps tonight).

Thanks!

No problem, that's kinda what I like to do. I spend most of my day figuring out how to do something and then try to stream line it so others can pickup on it easily.

Cool, looks great for your first attempt. Like I said easy easy easy.

173

(44 replies, posted in Scripting)

Tutorial Doctor wrote:
zester wrote:

Look into "Decision Trees" and "Finite State Machines" both easily done in Lua, and if you havent already done so study up on Coroutine's in lua.

A coroutine is similar to a thread (in the sense of multithreading): a line of execution, with its own stack, its own local variables, and its own instruction pointer; but sharing global variables and mostly anything else with other coroutines. The main difference between threads and coroutines is that, conceptually (or literally, in a multiprocessor machine), a program with threads runs several threads concurrently. Coroutines, on the other hand, are collaborative: A program with coroutines is, at any given time, running only one of its coroutines and this running coroutine only suspends its execution when it explicitly requests to be suspended.

If you need any help let me know.

Whew! ya lost me with that one zester! haha. I am actually a novice programmer, but I love problem solving, and that is why I was even able to make such a large script (for my experience level, I think it is large). I am going to look up what you suggested to see how it works, and to see whether or not I can implement it into my AI system.

Thanks! And I will ask if I need help!


Well a "Decision Trees" is just a tree like so ...

emotion = {["happy"]=happy, [mad]=mad}

function mad(value)
    if value == 1 then
        --npc is mad and might do something about it
    end

    if value == 10 then
        -- npc is #%^ livid and will try to murder everything in its path
    end
end

that makes random choices, you might trigger it by way of a collision even say if another npc collides with this one.


A "Finite State Machines" keeps track of what "State" your npc is in at the moment as an example our above NPC might be in a murderous rage until he kills so many other npcs then its state might change to "Hunger" and the npc goes to the nearest pizza place mind you he is still covered in virtual blood, and has a couple of slices of pizza.


"Coroutines" are like threads what they do is allows multiple action to happen at the same time without the game having to stop and wait for an action to finish. You can just say do this and report back to me when your done. Or in otherword's as an example with the above npc "Kill all of the npc's around you and let me know when your done" - "ok now go eat pizza" - "Now sit outside and wait for the police". But while your geiving instruction to tho one particular npc you can do the same for 500 other npc's, all at the sametime.


And you could possible have some invisible particles that represent sound waves, until there is a collision event with those particles that npc police officer might not know your npc is butchering the local church group.

Ok guys this isn't the "exact" look I wanted but it should give you an idea on what you can do when setting the "Paint Tools Brush Color" to something other than "White" and what painting a "Bump Map" can do.

Reminds me kind of a "Lord Voldemort". This is the 3k poly mesh. 

Now imagine waking up in the middle of the night with this guy hanging from your ceiling hissing at you, insisting he is going to eat your "face" !!!!!

https://lh6.googleusercontent.com/-nf6NgqyOWc4/UkyBk2qx8II/AAAAAAAABFE/PXFKUiQV12s/w960-h540-no/snapshot32.png

Tutorial Doctor wrote:

Zester, what version of makehuman do you have? How do I get it? Because my version does not look anything like yours.

"Nightly" but more specifically r6001
http://www.makehuman.org/content/downlo … build.html

I am using the "Native Look" theme found by clicking on "Settings" and then in the right side
panel in the "Themes" groupbox.

https://lh4.googleusercontent.com/-RQhhGc9Bse0/UkyBEeM1wtI/AAAAAAAABEY/OSTPUtl3kOg/w651-h408-no/snapshot31.png