Note: work in progress.
Here we will be looking at some, "Visual Effects" concepts/techniques used in the production of movies that we could also use in Maratis. Somethings may be dependent on the current state of the Maratis roadmap, but still relevant to you as a game developer.
Introduction
You might have seen films with heavy visual effects and heard people say “The visual effects were amazing!”, but what exactly are visual effects and how do they work? Visual effects (commonly shortened to Visual FX or VFX) is the term used to describe any imagery created, altered, or enhanced for a film or other moving media that cannot be accomplished during live-action shooting.
One of the single biggest misconceptions about movies is that the content in them is hard to produce or expensive, nothing could be further from the truth. The majority of money spent on a movie is on actors and rendering time. The movie Shrek took 5 years to render on 2000+ computers at the time of its creation. Imagine running 2000+ Amazon EC2 instances 24/7 for the next 5 years and that's not even counting storage for all your pre and post rendered files. Then you have your actors and the big names are not cheap.
But actually creating the content its self, doesn't cost anything other than time, and its all fairly easy to do. The VFX industry loves fast and easy, because 5-6 years of production isn't fun and it cost to much.
What we want to do is merge both VFX Production Concepts and Game Development Concepts into a single entity that is a great looking game. Some of the things you will see, might cause you to doubt your own ability and question my sanity  but I guarantee you with a little practice regardless if your an artist or a programmer or neither you will be able to produce everything here at a speed and quality, that has others thinking your a professional.
Table of Contents
Matte Painting
A matte painting is a painted representation of a landscape, set, or distant location that allows filmmakers to create the illusion of an environment that is nonexistent in real life or would otherwise be too expensive or impossible to build or visit. Historically, matte painters and film technicians have used various techniques to combine a matte-painted image with live-action footage. At its best, depending on the skill levels of the artists and technicians, the effect is "seamless" and creates environments that would otherwise be impossible to film.
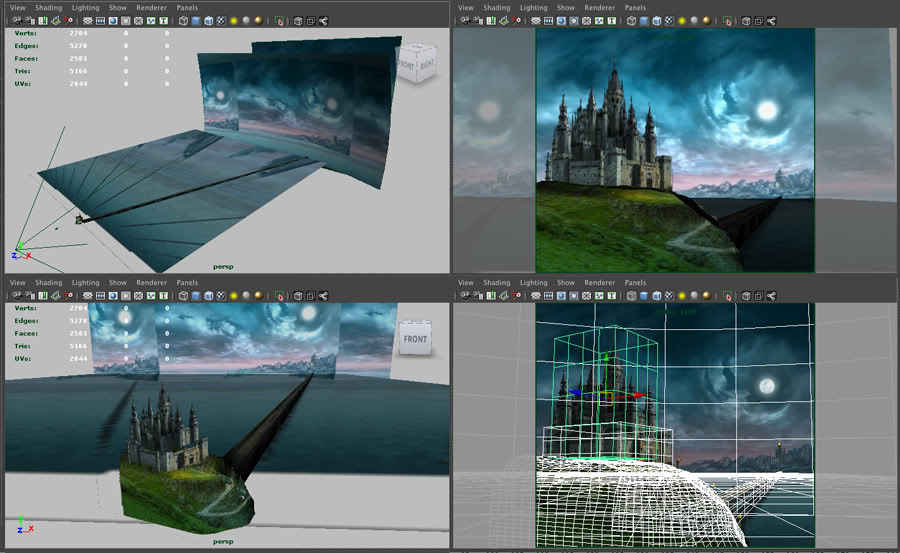
The following is a "Matte Painting In Progress". Matte Painting's are normally made up of various images that are layered and blended in a image editor in order to create something new. In the second screenshot you can see the different images on seperate layers.
Start

Halfway Completed

Completed

Camera Mapping
Camera Mapping, also known as camera projection, is a quick and easy technique to apply a quick ’3d’ look to a scene with the camera moving while minimizing the amount of actual modelling.
When combined with Matte Painting you can combine 3D and 2D objects in-order creating the illusion that your 2D Matte Painting is in fact a 3D Object.
How to apply to Maratis
Matte Painting and Camera Mapping could be used several different ways, below you will see a screenshot the idea was to use these two methods to fill in parts of a scene that might not be accessible to the player, like passing by a window or looking out a window and you see the ruins below.
Another idea would be to use this method on the outer-bounds of your world to create the illusion that your scene is much larger than it is.
You could also use this to prototype a scene you like but have trouble creating.
You could use matte painting to create really cool custom pieces of art work, like paintings hanging on a wall in your scene/game.
And finally we might eventually have support for video textures and knowing the above will allow you to build really cool intros and cut scenes.
Note: Normaly you would slice your source image up and use those to texture several different planes, or 3d objects, for more depth and less stretching.

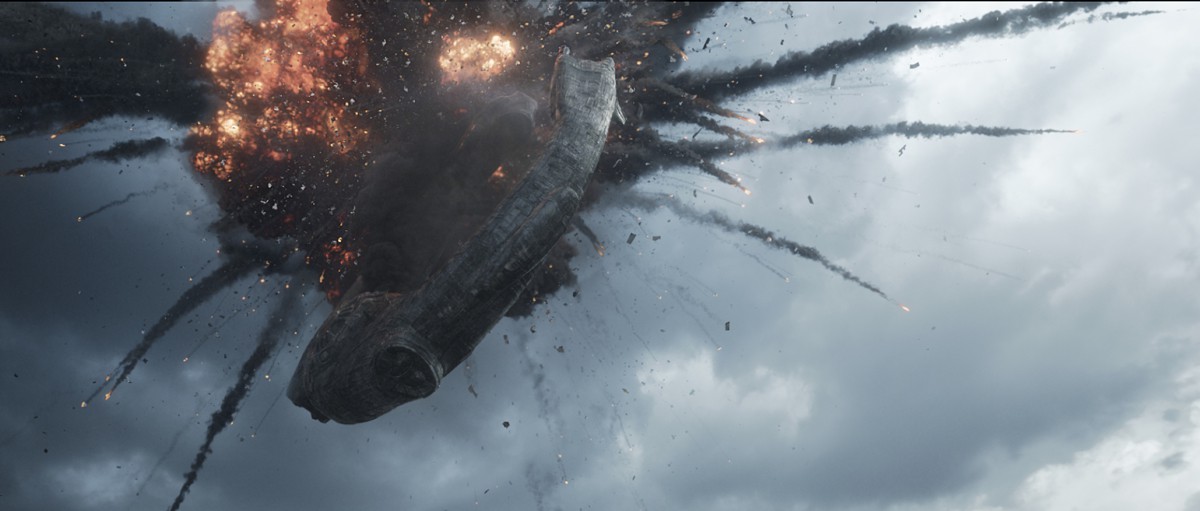
Animated Planes and Explosions
The idea here is to create a realistic explosion or similar particle effect, render out each frame to an image with a transparent background. Combine those rendered frames to a single image and create an Animated Plane. We would normally use these
at a distance but honestly I am sure even at close range they should be convincing enough.